A DIY Guide to Changing Your Motorcycle Tire in 2024
A flat tire can put a screeching halt to your motorcycle adventures. But don’t fret, stranded rider! Changing a motorcycle tire is an achievable skill that can save you time and money on the road. This comprehensive guide will equip you with the knowledge and confidence to tackle this task, empowering you to get back on the asphalt swiftly.
Safety First: Gearing Up for Success
Before diving in, prioritize safety. Park your motorcycle on a level, stable surface and engage the parking brake. Consult your owner’s manual to familiarize yourself with specific tire sizes and procedures for your motorcycle model.
Here’s the essential gear you’ll need:
- Motorcycle jack: A jack specifically designed for motorcycles will provide the lifting power and stability needed.
- Tire irons: Invest in a pair of sturdy tire irons specifically designed for motorcycle tires. These specialized tools help pry the tire off the rim without damaging it.
- Valve core remover: This tool allows you to remove the valve stem core to deflate the tire safely.
- Soapy water solution or tire lubricant: This lubricant will help ease the tire off the rim.
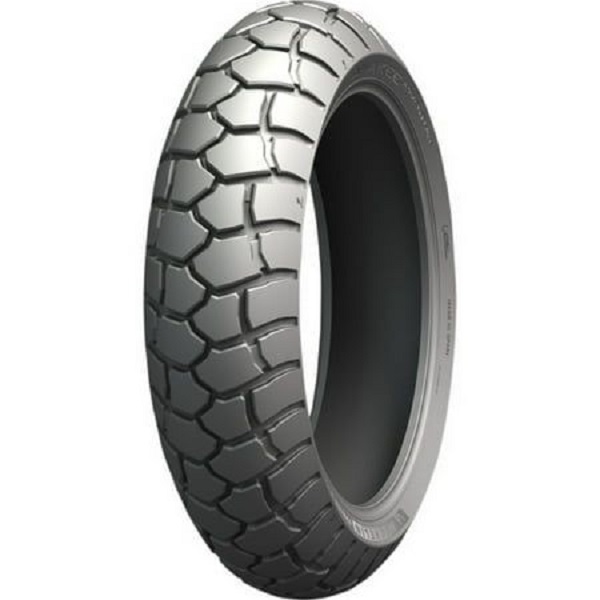
- New tire: Ensure the new tire matches the size and specifications outlined in your owner’s manual.
- Torque wrench: A torque wrench ensures the lug nuts are tightened to the manufacturer’s recommended specifications, crucial for safe riding.
- Shop rags: These will come in handy for cleaning and wiping down tools and surfaces.
- Safety glasses: Protect your eyes from flying debris during the tire removal process.
- Gloves: Gloves will shield your hands from grime and potential pinches.
Disassembly: Step-by-Step Tire Removal
- Deflate the Tire: Locate the valve stem on the rim and use the valve core remover to remove the valve core. Press down on the valve stem to release the remaining air.
- Loosen the Lug Nuts: Slightly loosen the lug nuts with a wrench while the motorcycle is still on the ground. This will make them easier to remove once the motorcycle is lifted.
- Jack Up the Motorcycle: Carefully position the motorcycle jack under the designated frame points outlined in your owner’s manual. Lift the motorcycle until the tire you’re replacing is off the ground.
- Remove the Lug Nuts: Completely remove the lug nuts and store them in a safe place to prevent losing them.
- Separate the Wheel: Slide the wheel off the axle and lay it flat on a stable surface.
Breaking the Bead: Dismounting the Old Tire
Now comes the more technical part: removing the old tire from the rim.
- Locate the Rim Lock (if applicable): Some motorcycle wheels have a rim lock that helps secure the tire on the rim. If your wheel has one, loosen it slightly before proceeding.
- Position the Tire Irons: Place one tire iron under the lip of the tire, close to the valve stem. The hooked end of the iron should be positioned between the tire bead and the rim.
- Lever the Bead: While holding the tire iron firmly in place, use your other hand to step on the opposite side of the tire iron, leveraging it to pry the tire bead off the rim.
- Work Around the Rim: Repeat step 3, moving the tire iron around the rim and leveraging it to detach the tire bead from the rim all the way around the circumference. Apply soapy water solution or tire lubricant as needed to ease the process.
- Repeat for the Other Side: Once one side of the tire bead is off the rim, flip the wheel over and repeat steps 3 and 4 to detach the other side of the tire bead.
Pro Tip: Many riders find it helpful to use a third tire iron to hold the first section of the tire bead off the rim as they work their way around the circumference.
Mounting the New Tire: A Fresh Start
With the old tire successfully removed, it’s time to install the new one.
- Inspect the Rim: Before mounting the new tire, take a moment to inspect the rim for any damage or debris that could compromise the seal between the tire and the rim. Clean the rim thoroughly with a rag.
- Position the New Tire: Place the new tire onto the rim, ensuring the directional arrow on the tire sidewall aligns with the rotation direction of your motorcycle (refer to your owner’s manual for clarification).
- Lever the First Bead: Apply soapy water solution or tire lubricant liberally to aid the process. As you work your way around the rim, use a third tire iron (optional) to hold the initial section of the bead in place.
Caution: Be mindful not to pinch the inner tube (if applicable) between the tire and the rim as you pry the bead on.
- Final Touches: Once the first bead is entirely secured on the rim, inflate the new tire to the recommended air pressure specified in your owner’s manual. This will help to pop the second bead onto the rim.
- Seating the Second Bead: Starting opposite the valve stem, use your tire irons to carefully pry the remaining tire bead onto the rim. Work your way around the circumference, applying lubricant as needed. The final few sections may require extra leverage and effort.
Top Tip: If you’re struggling to seat the final sections of the bead, a bead buddy tool can be helpful. This tool protects the rim and provides additional leverage to pry the tire onto the rim.
Reassembly: Putting It All Back Together
- Reinstall the Wheel: Carefully align the wheel with the fork or swingarm on your motorcycle. Slide the wheel back onto the axle.
- Tighten the Lug Nuts: Screw on the lug nuts by hand as much as possible. Then, using a torque wrench, tighten them to the manufacturer’s recommended specifications in a star pattern. Double-check the tightness after riding for a short distance (around 10 miles) to ensure they haven’t loosened.
- Lower the Motorcycle: Carefully lower the motorcycle using the jack and remove the jack once the motorcycle is fully supported on the ground.
- Reinflate the Tire (if necessary): Check the tire pressure again and inflate it to the recommended level if needed.
- Replace the Valve Core: Screw the valve core back into the valve stem and replace the valve stem cap.
Safety Check: Ensuring a Smooth Ride
Before hitting the road, take a moment to perform a safety check:
- Visually inspect the tire: Ensure the tire is properly seated on the rim and there are no bulges or imperfections.
- Double-check the lug nuts: Verify that all the lug nuts are tightened to the recommended torque specifications.
- Test the brakes: Apply the brakes a few times to ensure they are functioning properly.
Congratulations! You’ve successfully changed your motorcycle tire. This valuable skill empowers you to tackle roadside mishaps with confidence and get back on the road in no time.
Beyond the Basics: Pro Tips for Success
- Practice Makes Perfect: Consider practicing changing a tire at home before you find yourself stranded on the road. This will help you become familiar with the process and avoid fumbling under pressure.
- Invest in Quality Tools: Having the right tools for the job makes the process significantly easier and less frustrating. Opt for sturdy tire irons and a reliable torque wrench.
- Consider a Bead Buddy: A bead buddy tool can be a lifesaver, especially when wrestling with stubborn tire beads.
- When in Doubt, Seek Help: If you’re unsure about any step of the process or encounter difficulties, don’t hesitate to seek assistance from a qualified mechanic. Your safety is paramount.
Additional Considerations for Modern Motorcycles
Technology advancements in motorcycles can introduce slight variations to the tire changing process. Here’s a brief overview of some potential considerations for newer motorcycles:
- Tire Pressure Monitoring Systems (TPMS): Many modern motorcycles come equipped with TPMS sensors mounted on the valve stem. These sensors communicate tire pressure information to the instrument cluster. When changing a tire, be mindful of the TPMS sensor and ensure it’s carefully removed and reinstalled without damaging it. Consult your owner’s manual for specific instructions on TPMS sensor removal and reinstallation for your motorcycle model.
- Single-Sided Swingarms: Some high-performance motorcycles utilize a single-sided swingarm design. This design eliminates the need to remove the entire wheel for tire changes. However, it often requires a specialized paddock stand and potentially different tools for tire removal and installation. If you own a motorcycle with a single-sided swingarm, thoroughly review your owner’s manual for the proper tire changing procedure.
The Benefits of DIY Tire Changes
While some riders prefer to leave tire changes to professionals, there are several advantages to mastering this skill yourself:
- Cost Savings: Changing your own tire can be significantly cheaper than paying a service shop. The cost of labor for a tire change can vary depending on your location and the shop, but it typically falls within the range of $40 to $80 per tire. By doing it yourself, you can save this money and invest it in other motorcycle maintenance or upgrades.
- Self-Reliance: Knowing how to change a tire empowers you to handle roadside emergencies more efficiently. A flat tire won’t leave you stranded for hours if you’re equipped with the knowledge and tools to fix it yourself.
- Improved Motorcycle Knowledge: The process of changing a tire provides valuable insight into the inner workings of your motorcycle. Gaining this practical knowledge can help you troubleshoot other minor issues and become a more confident rider overall.
Taking Control of Your Ride
Equipping yourself with the ability to change a motorcycle tire is a valuable skill for any rider. This comprehensive guide has equipped you with the knowledge and step-by-step instructions to tackle this task confidently. Remember, safety is paramount. Always prioritize safe practices and don’t hesitate to seek professional help if you’re unsure about any aspect of the process.
By mastering this skill, you gain self-reliance, save money, and deepen your understanding of your motorcycle. So, the next time you encounter a flat tire, you’ll be prepared to conquer the road and get back to enjoying the ride.
Now that you’re armed with the knowledge, take action! Browse our extensive selection of motorcycle tires online and find the perfect match for your riding style and motorcycle. Don’t forget to stock up on essential tools like a motorcycle jack, tire irons, and a torque wrench. With the right preparation, you’ll be ready to handle any flat tire situation with confidence.